Having a properly operating dryer machine is crucial to ensuring that your laundry process is fast and easy. With time though lint and debris can accumulate in the inside of your dryer vent, limiting airflow and causing your dryer to labouredly work harder. This does not only increase the drying time and the energy bills, but may also be a serious safety risk, such as fire hazards. It is essential, with or without a washer and a dryer, a washer-dryer combo, or an Electrolux washer and dryer to ensure the system of vents is clean. In this manual, we will take you through the step-by-step procedure of cleaning the dryer vent, what you will need along with the preparation and what are the best maintenance tips so that you can maintain a safe and efficient running of the laundry appliances.
The Reason You Should Clean Your Dryer Vent
Cleaning your dryer vent is not a simple task but it is an essential element in servicing your dryer appliance and ensuring the safety of the home. With time, lint and debris may begin to build up within the vent and duct system slowing the passage of air and increasing the effort of your dryer. This may cause increased drying times, energy bills and even fire risk. You prevent your home and also increase the lifetime of your washer and dryer by also ensuring that you clean your dryer vent regularly. Clean vents give your washing machine dryer combo or individual units a better performance that ensures your laundry process is hassle free.
Indications Your dryer vent requires cleaning
What makes you realize it is time to dryer vent cleaning? The first thing to notice is that clothes are taking longer to dry and there is too much heat around the dryer machine and a burning smell is emitted by the dryer machine. It is also possible to see a lint formed around the vent cover dryer or at the exhaust. When your dryer appears to be making more noise than usual, or when the vent inside your house seems clogged, then it is a good sign that your clothes dryer vent requires cleaning. By neglecting these indicators, you may decrease the effectiveness of your dryer and may even have to pay a lot of money on its fixing, which can be prevented through timely maintenance.
Equipment required to clean dryer vents
In order to be able to clean your dryer vents, you need to have the appropriate tools that will make the process easier and safe. A dryer vent brush kit or a dryer vent cleaning kit is necessary in order to clean deep into the duct. A vacuum, screwdriver, safety gloves, and a mask may also be required to keep off dust. Some of them require a magnetic dryer vent or special vent dryer cleaning kit to reach compact areas. The proper equipment will guarantee an excellent cleaning process, as well as preserve your washer and dryer. It is possible to prepare these tools in advance and make the cleaning process more efficient and timely.
Step 1: You need to turn off your dryer and find the system of the vent
Safety first! It is also important to remember to clean your dryer machine before unplugging it. Measure the location of sacrifices of your indoor dryer vent or ventless dryer vent (indoor and outdoor). In the case of outdoor dryer vent cover, it must be accessible and without interruptions. It would be helpful to check the duct layout prior to beginning the cleaning process. This precaution will avoid mishaps and you will be able to access every section of the vent so your cleaning of the dryer vent will be more efficient and less hazardous.
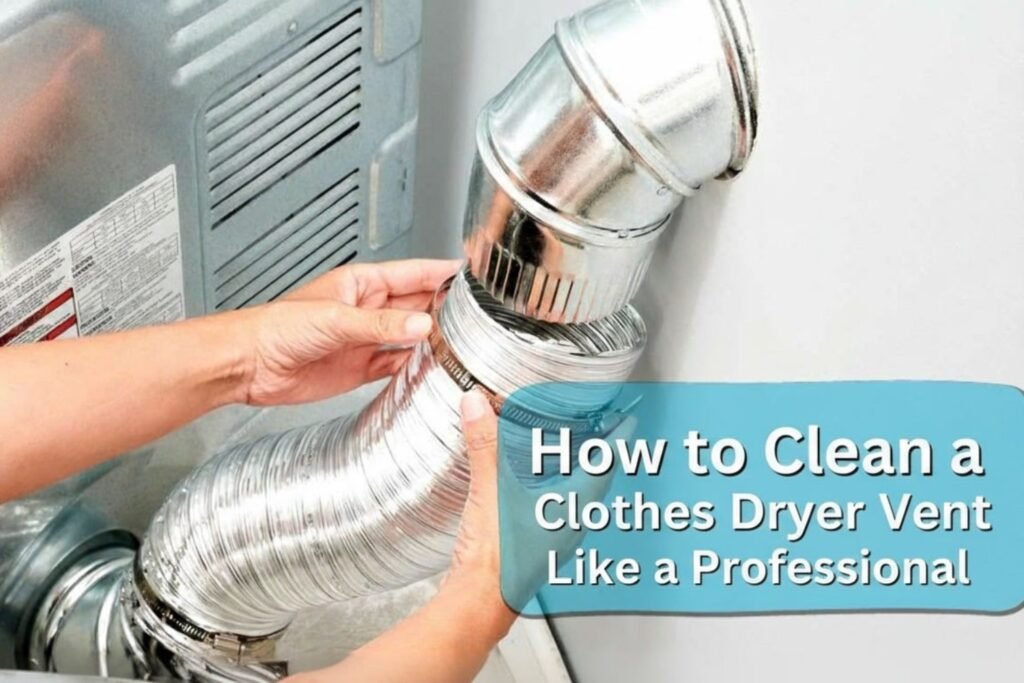
Step 2: Remove the Dryer Vent Hose Safely
After you have unplugged your dryer, make sure you remove the vent hose. Unscrew the clamps and pull the loosely-fitting hose off the wall or the back of the dryer. In long ducts, or in ducts of a delicate nature, make special care to avoid cracking or injury. When using a dryer vent kit in your system, then refer to the instructions of the manufacturer to prevent bending or breaking the vent. To clean the vent properly, it is necessary to remove lint first, then clean the vent with a proper dryer duct cleaning, and make sure that your dryer works in the most efficient way possible.
Step 3: Clean the hose that moves out the dryer
Clean the hose by using a dryer vent brush kit or a flexible cleaning brush to get rid of the lint that has been built up. Using the brush, spin it slowly to loosen debris and then finish with a vacuum to pick up the rest of the debris. Routine cleaning of the hose during clothes dryer vent cleaning helps to avoid the restriction of airflow and minimizes fire hazards. With homes containing a washer dryer combo, this is one of the most important steps since one of the vents usually has a dual purpose and therefore should be maintained as much as possible to achieve maximum use.
Step 4: Clean the Duct and Exhaust Path of the Wall
Clean up the hose and then pay attention to the wall duct. Take the brush and insert it on the duct and move it back and forward to take the lint and dust. Examine the outside vent cover of the dryer to ensure that there is no blockage or bird and rodent nest. Proper cleaning of the wall duct will aid in the smooth movement of air and overheating of the dryer machine. To clean the duct of the dryer effectively it is important to maintain both the hose and the wall duct in order to minimize the chances of fire and enhance efficiency of drying.
Step 5: Clean the Exterior Vent Outside Your Home
Take away the outer vent cover and empty any lint, dust, or debris that might have taken place. Make sure that the vent flaps are free of any obstruction. With a clean exterior vent, and a well-cleaned internal duct, the air flow in your dryer and its effectiveness is improved. Consistent cleaning of the vent cover dryer will help to ensure safer work and increase the life of your washer and dryer. The outdoor cleaning is as crucial as the interior vent during dryer vent cleaning.
Step 6: Reconnect Dryer Hose and Test Airflow
After cleaning all parts, the vent hose should be reattached. Attach your dryer machine and start a small cycle to make sure that it is properly airing. verify the internal and external vents and ensure that they are clear. This last measure can be considered as a guarantee that your dryer duct cleaning repair was effective and your clothes dryer vent repair is complete. Effective reconnecting also aids in preventing leaks, which may lower the effectiveness and lead to lint accumulation with time.

How To Clean Your Lint Screen and Lint Tap
Don’t forget the lint screen! Always wash it after every use in order to keep the best work of the dryer. Clean the screen and get trapped lint out every now and then by washing it with warm water. Clean lint trap is used to supplement dryer vent cleaning to make sure that your dryer machine can dry clothes efficiently and safely. In the case of an Electrolux washer and dryer or any other brand, cleaning the lint screen along with the regular vent cleaning, keeps your appliance in a very good working condition.
How Often Should You Clean Your Dryer Vent?
Dryer vent cleaning is recommended at least once a year to most homes but some may require more frequent cleaning depending on the use. Check that there is not too much lint accumulated and that there are no problems with air will cause you to think that you may have to clean faster. Routine maintenance will eliminate any chances of fires, increase efficiency and also increase the lifespan of your washer and dryer. This combined with a regular lint screen cleaning provides a more effective, and safer laundry program.
The most frequent Dryer Vent mistakes
Plastic ducts or tightly curling hoses are not to be used since it may trap lint and narrow the airflow. Do not place your dryer machine too near the wall, or you should maintain a clear vent cover dryer. Failure to observe these basic errors may cause poor cleaning of dryer vents and possible fire risk. The correct installation and maintenance are important in ensuring that the clothes dryer vent cleaning is effective and safe.
When to Call a Professional Dryer Vent Cleaning Service
When your ducts are very long and complicated, or simply after cleaning them in DIY mode, it is a good idea to have a professional come in. AS Appliance Repair is able to clean up the places that are hard to reach with safety and inspect them to detect the damage. The query of dryer vent cleaning near me can refer you to the professionals who will ensure that the airflow is restored and that your dryer device is not damaged. And you can be recommended to upgrade or replace your duct by professionals in case it is old-fashioned or unsafe.
FAQ’s
Q: How long does cleaning take?
A: The average length of time spent on cleaning the vents is 30-60 minutes depending on vent length.
Q: Which tools are best?
A: Dryer vent cleaning kit or dryer vent brush kit: This is to be completely cleaned.
Q: Does cleaning save energy?
A: Yes! A clean vent will shorten the drying time and save electricity and extend the life of your washer and dryer.
Final Thoughts
Dryer vent cleaning should be a regular procedure to ensure safety, energy conservation and the performance of the appliances. Cleaning of the vent, hose, exterior duct, and lint screen is the best way to make sure that your dryer machine and washer dryer combo are functioning optimally. Keeping your machinery in order and performing these few steps, you will secure your house, save on your power bill and have no worries about laundry any day. AS Appliance Repair is the place to go to request professional help or inquiries regarding dryer vent cleaning in my area.
Keep your dryer machine safe and efficient. Schedule professional dryer vent cleaning now at AS Appliance Repair and enjoy hassle-free laundry.